Initial Windows Server Configuration and Remote Access Guide
This guide provides step-by-step instructions for connecting to a Windows server and enabling Remote Desktop access.
Prerequisites
- A powered-on Windows server
- Access to the server management panel
- Initial authentication credentials (username and password)
Step 1: Initial Server Connection and Changing the Default Password
-
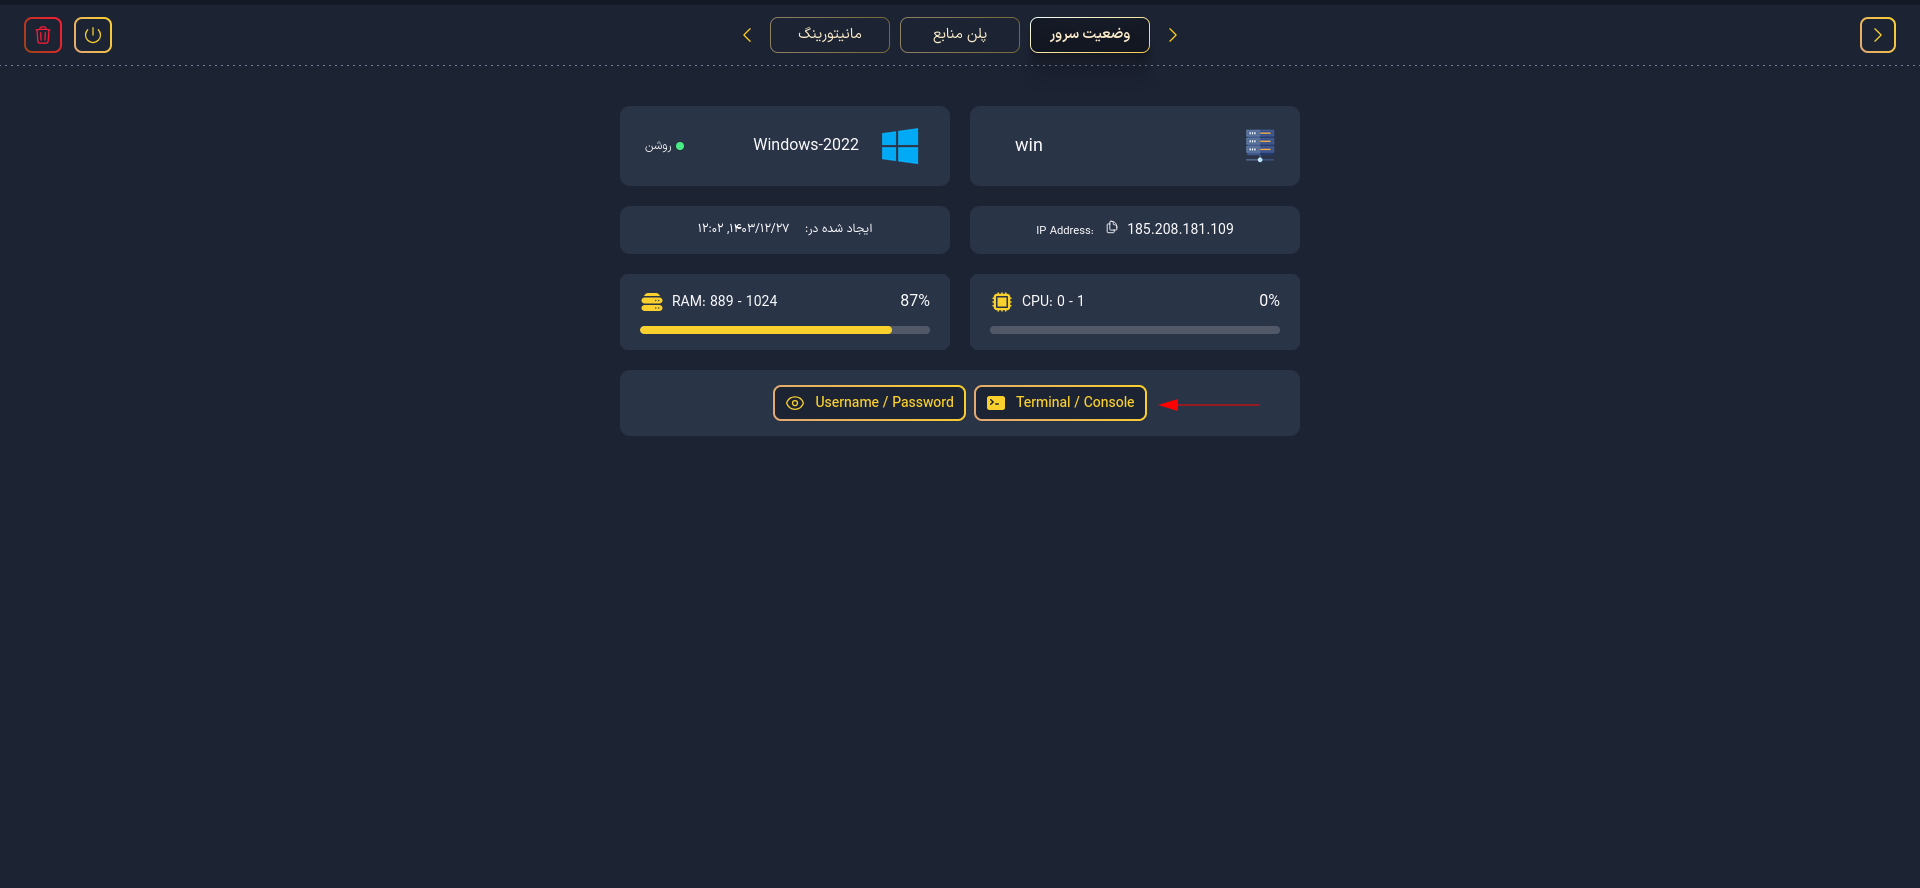
In the server management panel, navigate to Terminal/Console.
-
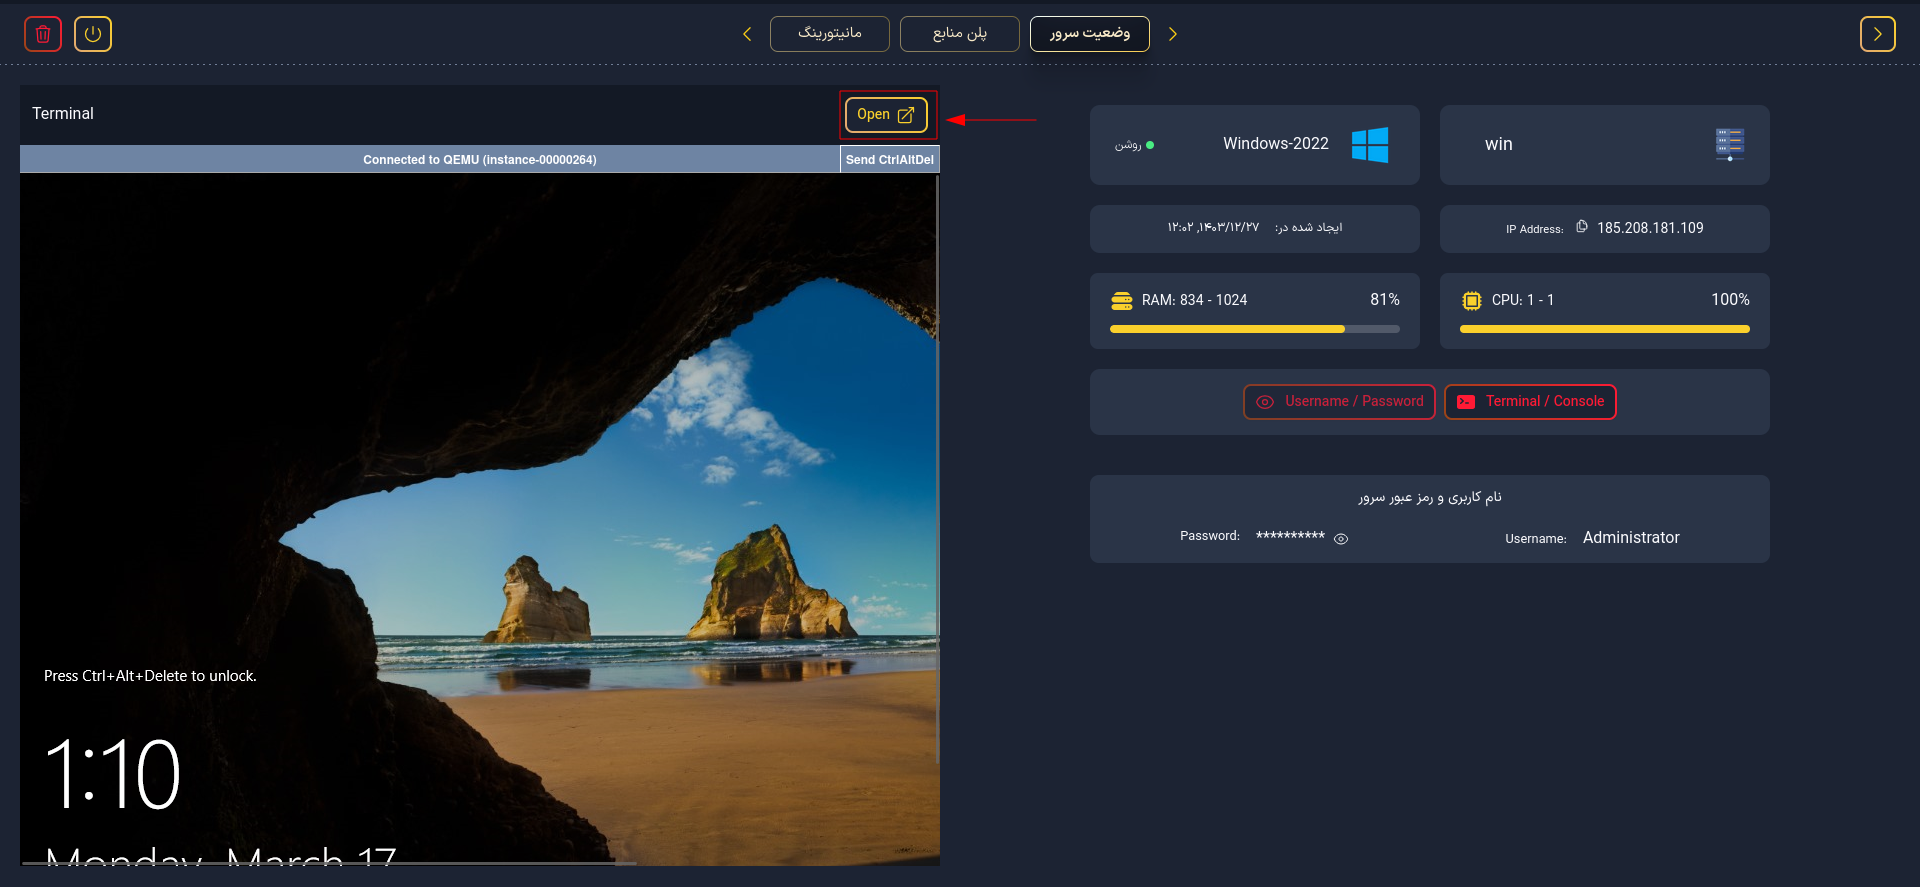
Click Open in the Terminal panel to access the full-screen server console.
-
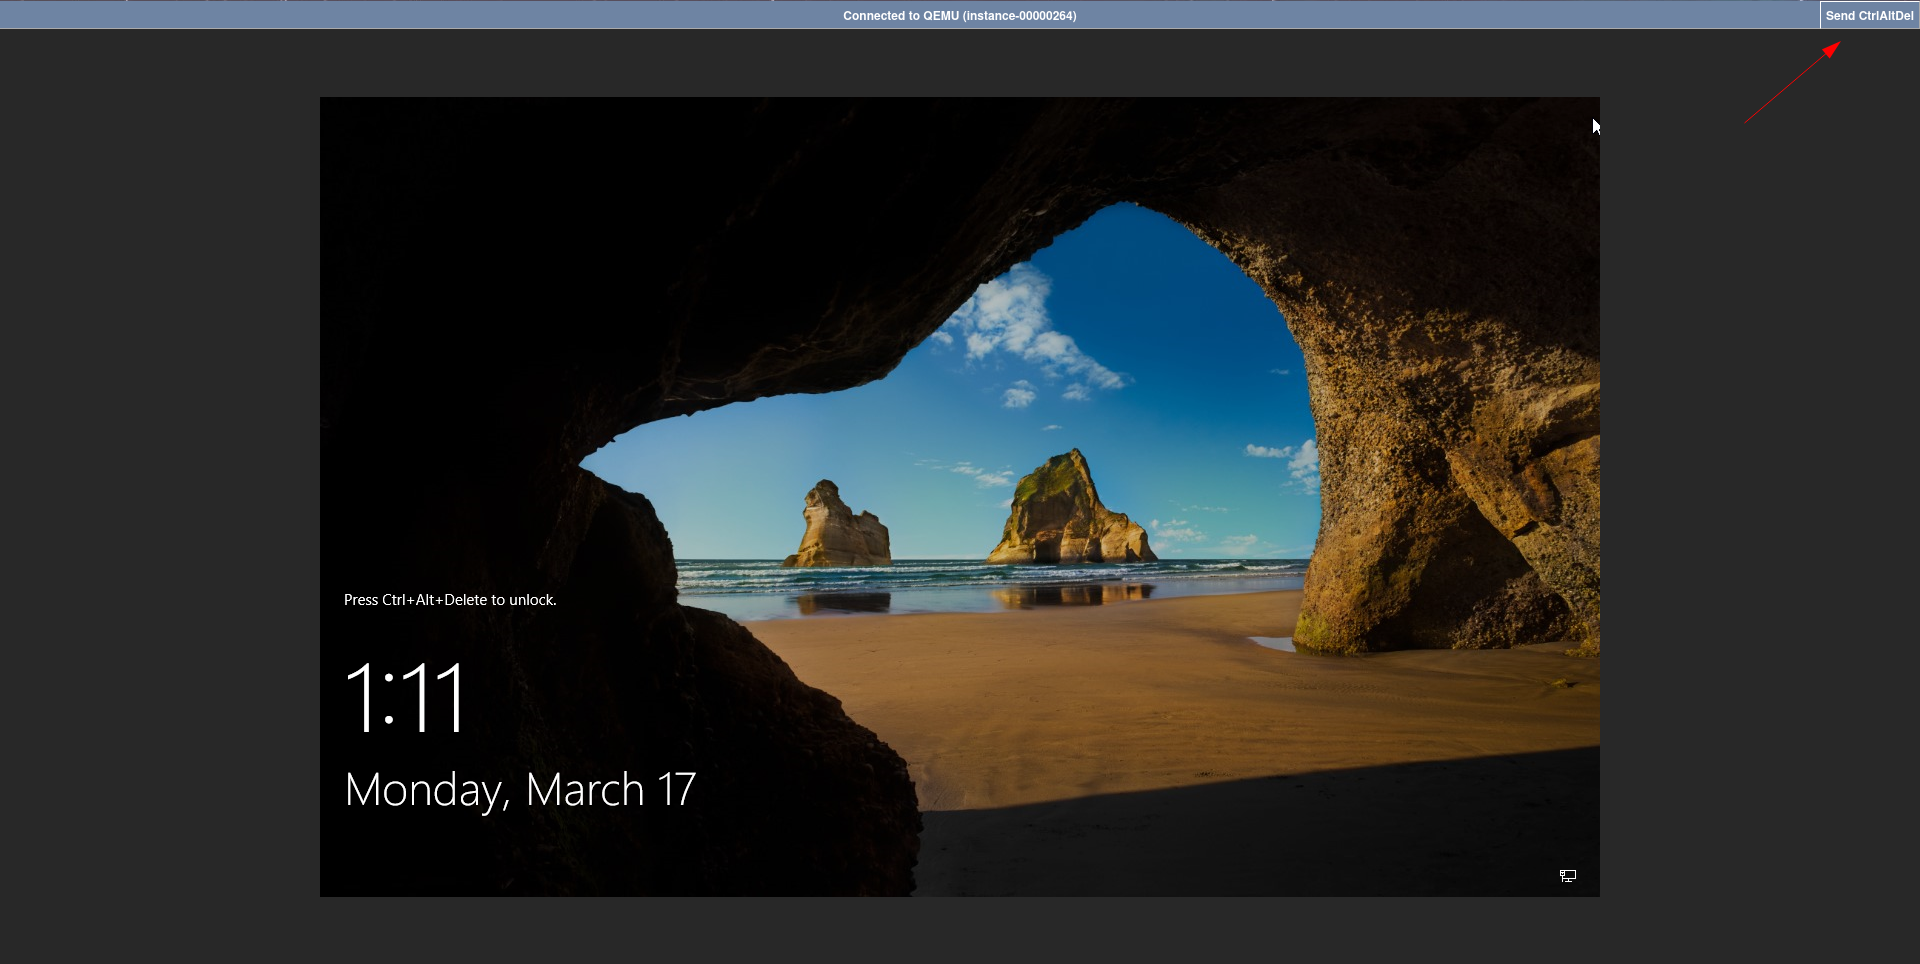
Click Send CtrlAltDel to bring up the login screen.
-
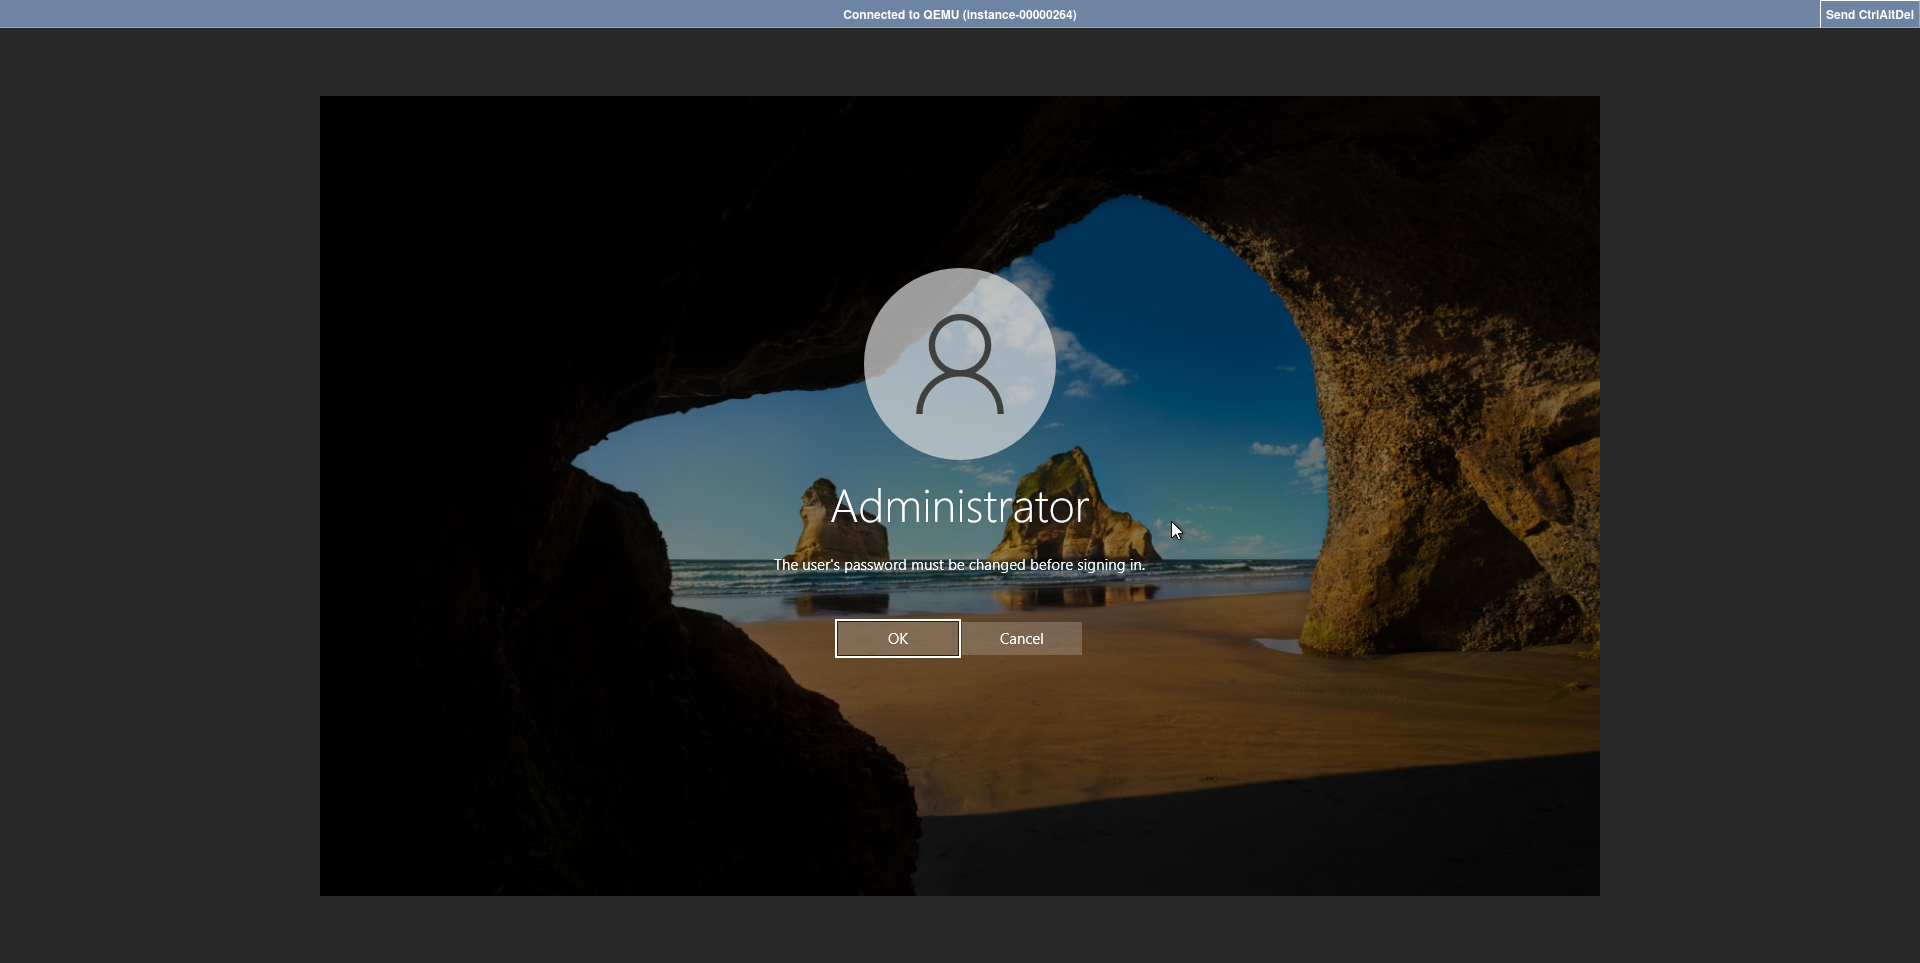
Log in using the default password found in the server status tab, then click OK.
-
On the password change screen:
- Enter the current (default) password in the first field.
- Enter the new password in the second and third fields.
For security reasons, the new password must meet the following requirements:
- At least 8 characters long
- Contains uppercase letters (A-Z)
- Contains lowercase letters (a-z)
- Includes at least one number (0-9)
- Includes at least one special character (!@#$%^&*()_+-=[]|;:,.?)
Step 2: Enabling Remote Desktop (RDP)
-
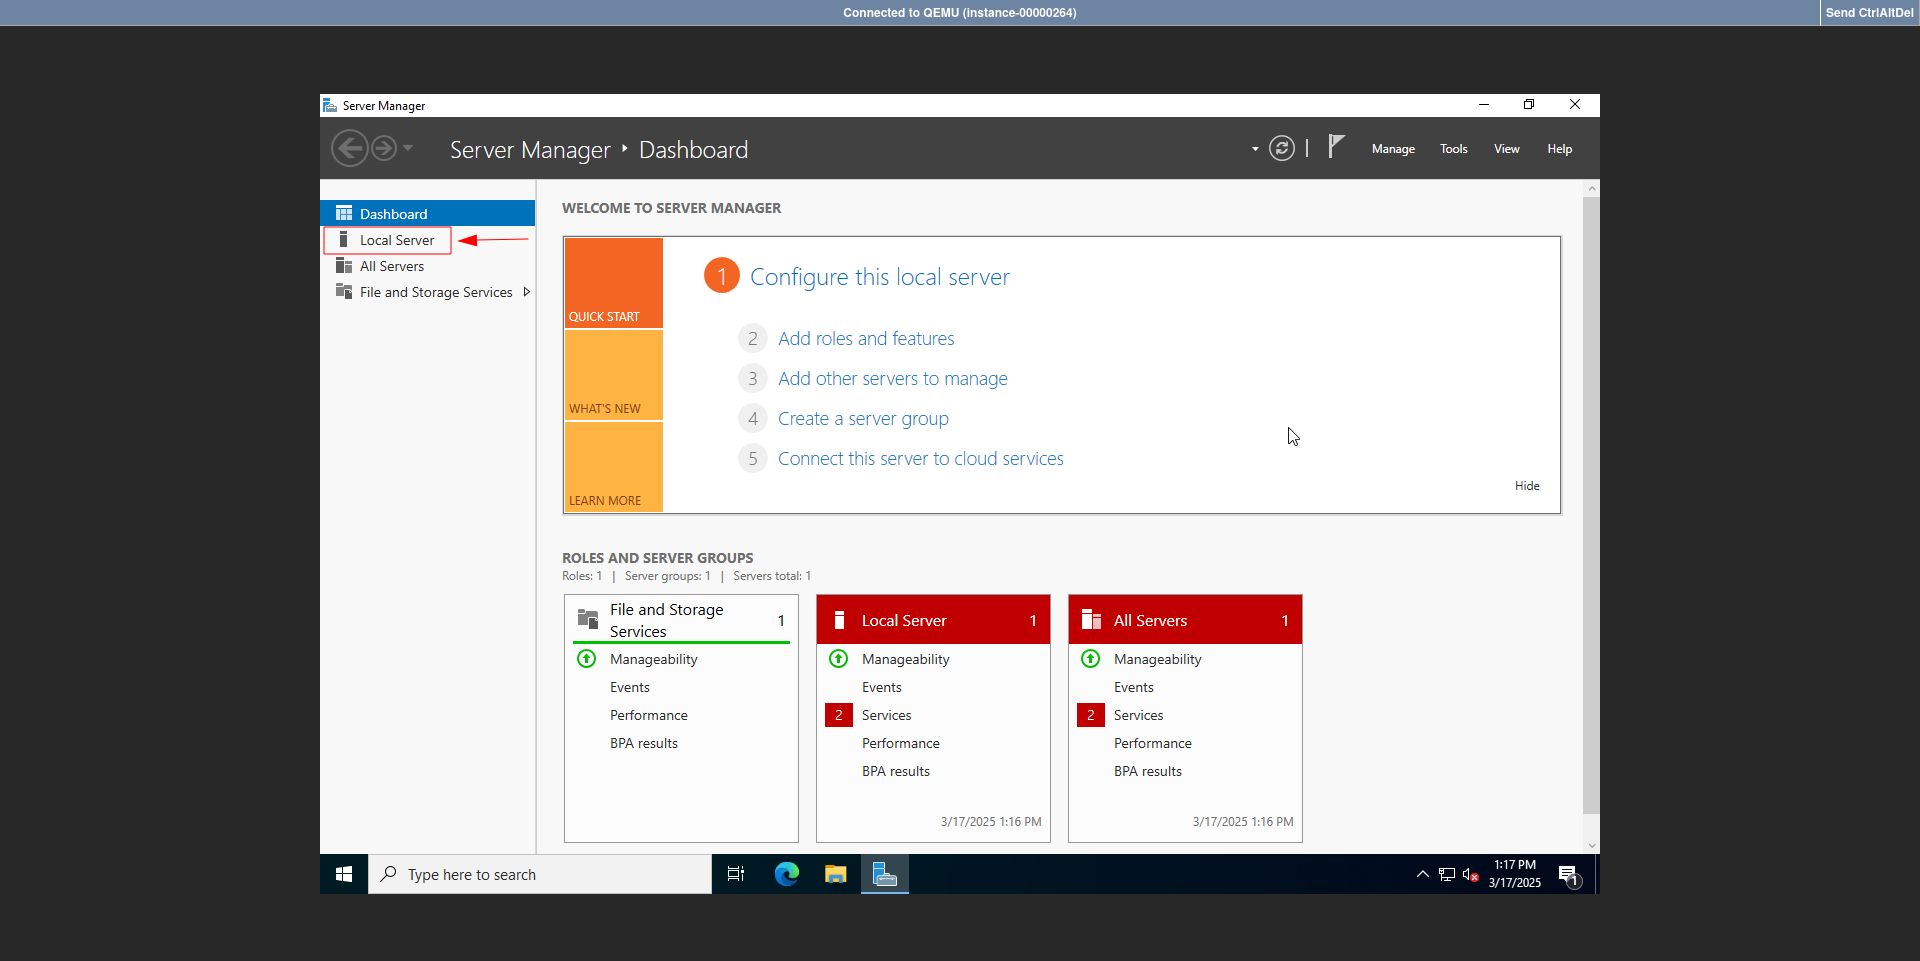
After logging in, wait for Server Manager to launch automatically.
-
In the left navigation panel, select Local Server.
-
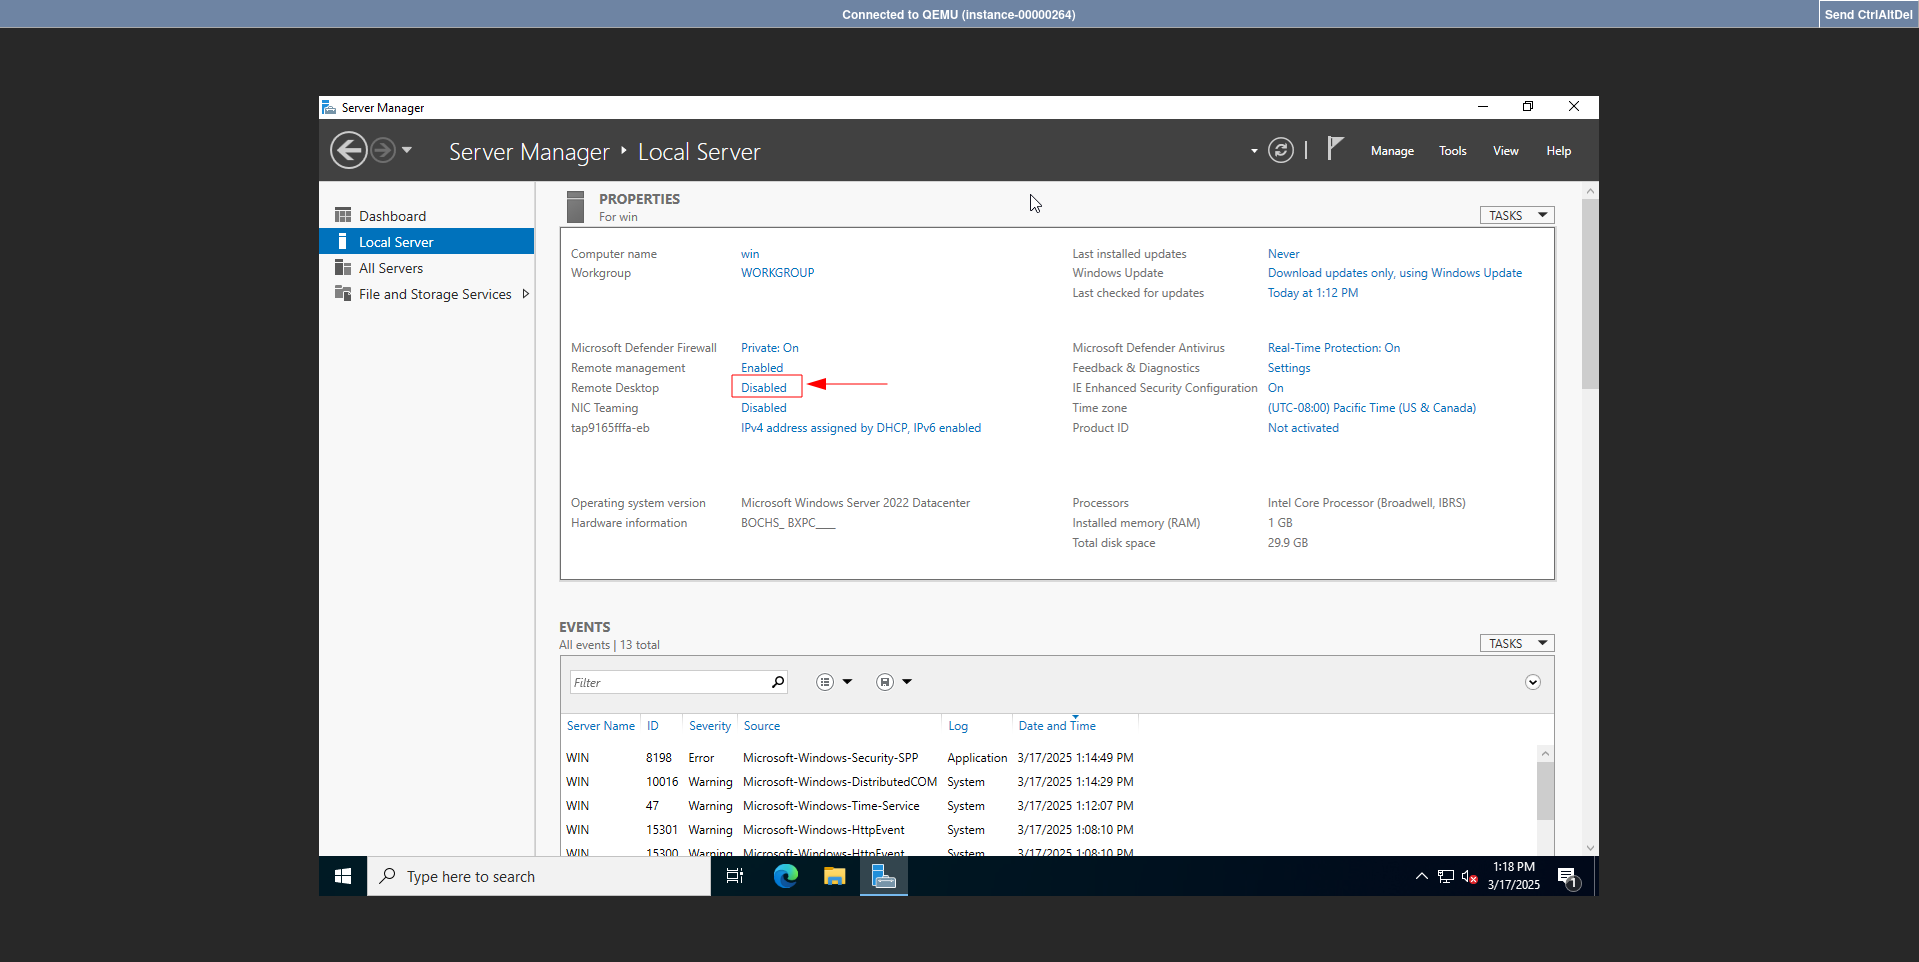
In the properties list, find Remote Desktop, which is likely set to Disabled. Click on it.
-
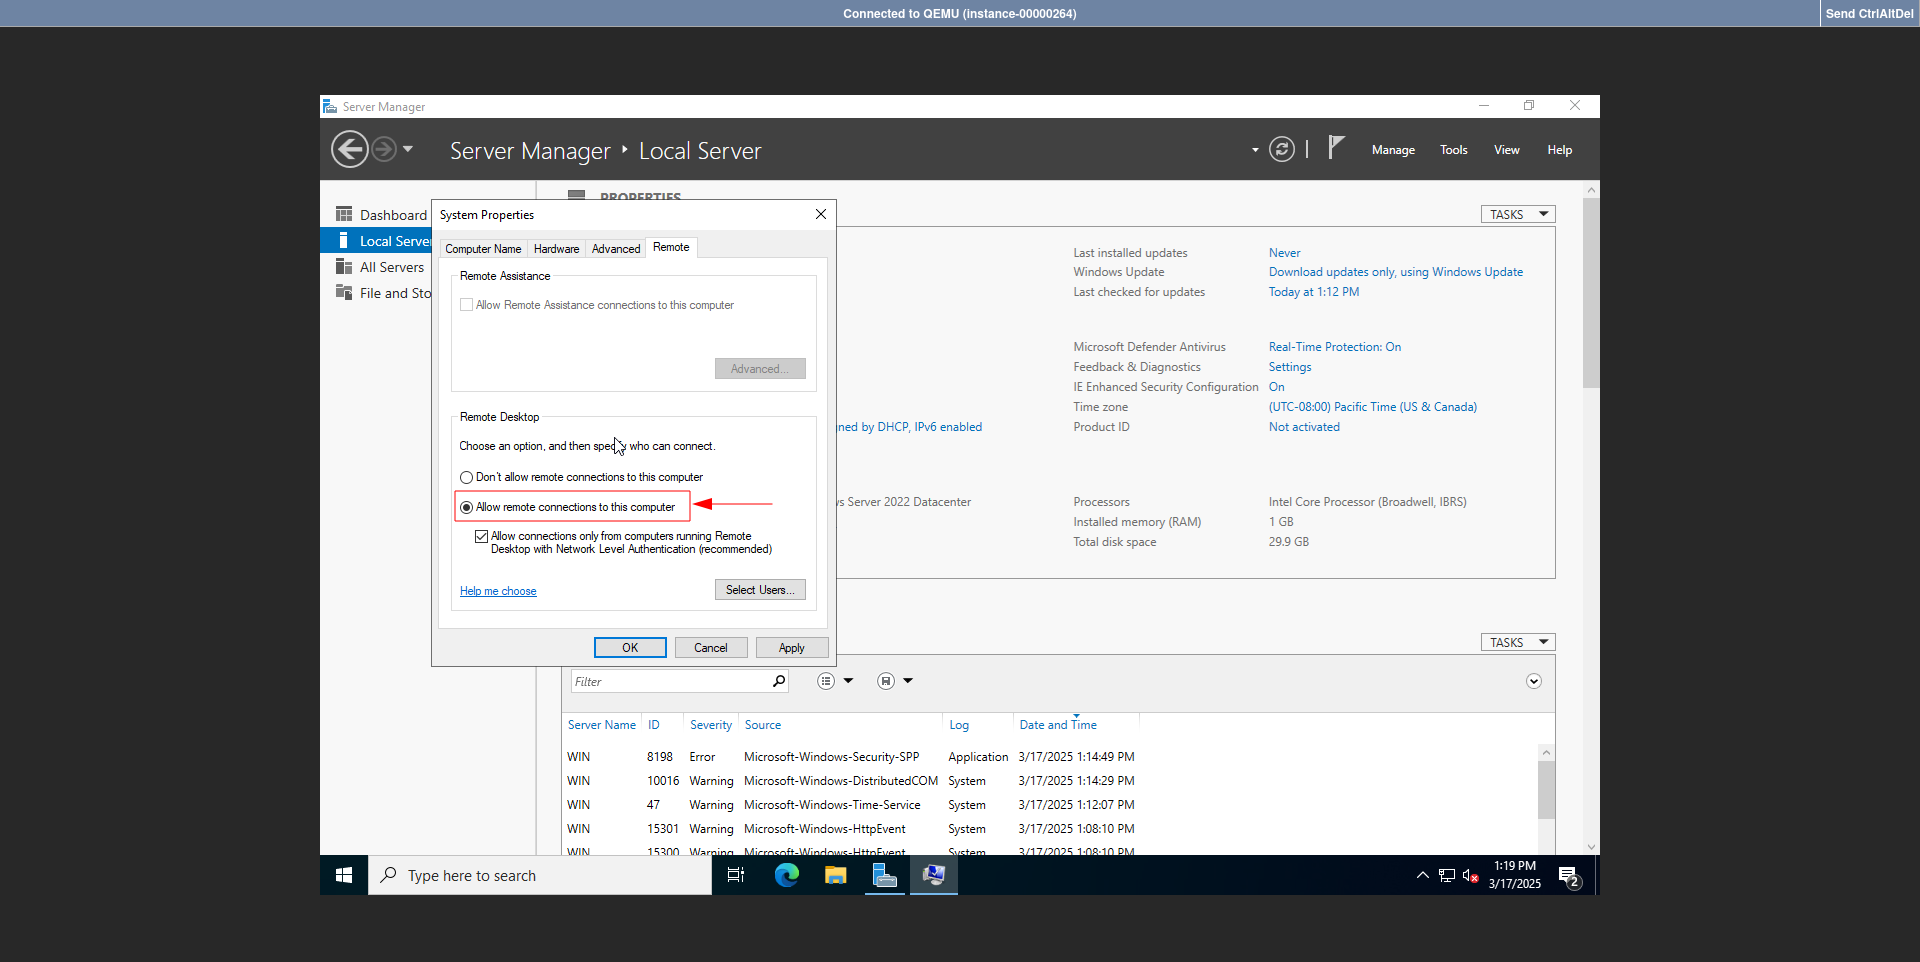
In the System Properties window, go to the Remote tab and under Remote Desktop, select Allow remote connections to this computer.
-
(Optional) For enhanced security, keep Allow connections only from computers running Remote Desktop with Network Level Authentication enabled.
-
Click Apply, then OK.
-
Wait for the Remote Desktop status in the Local Server page to change to Enabled.
To ensure remote accessibility, verify that port 3389 (the default RDP port) is open in the server firewall.
Step 3: Connecting to the Server Remotely
-
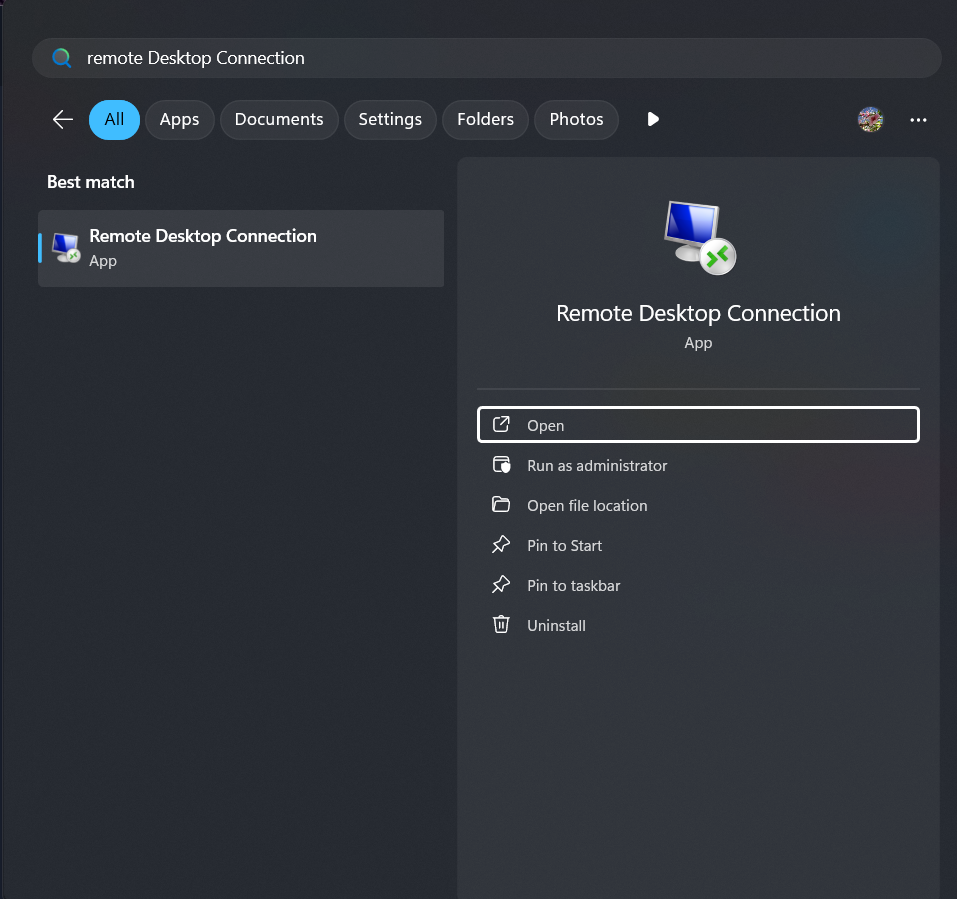
On your personal computer, open Remote Desktop Connection:
- On Windows: Open the Start menu and search for Remote Desktop Connection.
- Shortcut: Press
Windows + R, typemstsc, and pressEnter.
-
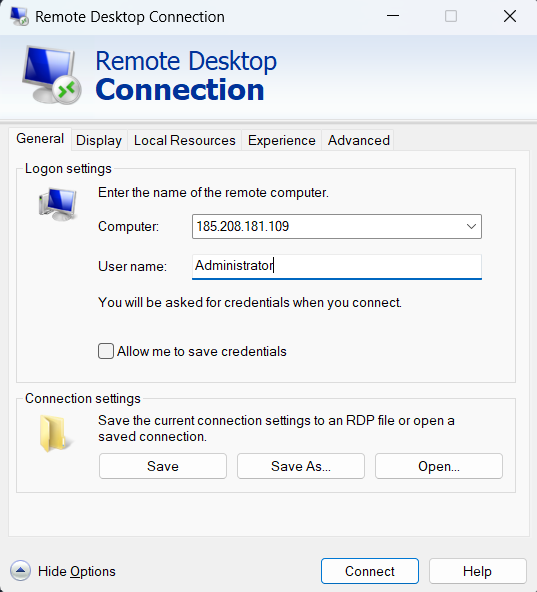
In the connection window:
- Computer: Enter the server’s IP address.
- Username: Enter the server administrator username (usually
Administrator). - (Optional) Click Show Options to access advanced settings.
-
Click Connect.
-
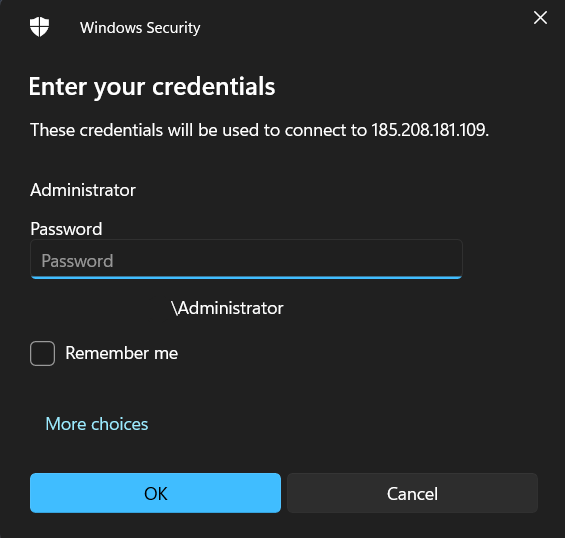
When prompted for authentication, enter the new password set in Step 1 and click OK.
-
In the certificate validation window, enable Don't ask me again for connections to this computer for faster future connections, then click Yes.
-
Once the connection is established, the Windows Server desktop will be displayed.