Setting Up and Configuring a Private Network
This document provides a step-by-step guide to creating a private network in the cloud control panel and configuring it on the operating system.
Step 1: Creating a Private Network in the Cloud Control Panel
To set up a private network, follow these steps in the cloud control panel:
-
Log in to the Control Panel:
- Sign in to your account and navigate to the Cloud Server section in the control panel.
-
Access the Networks Section:
- From the main menu, select Network.
-
Create a New Network:
- Click on Private Network.
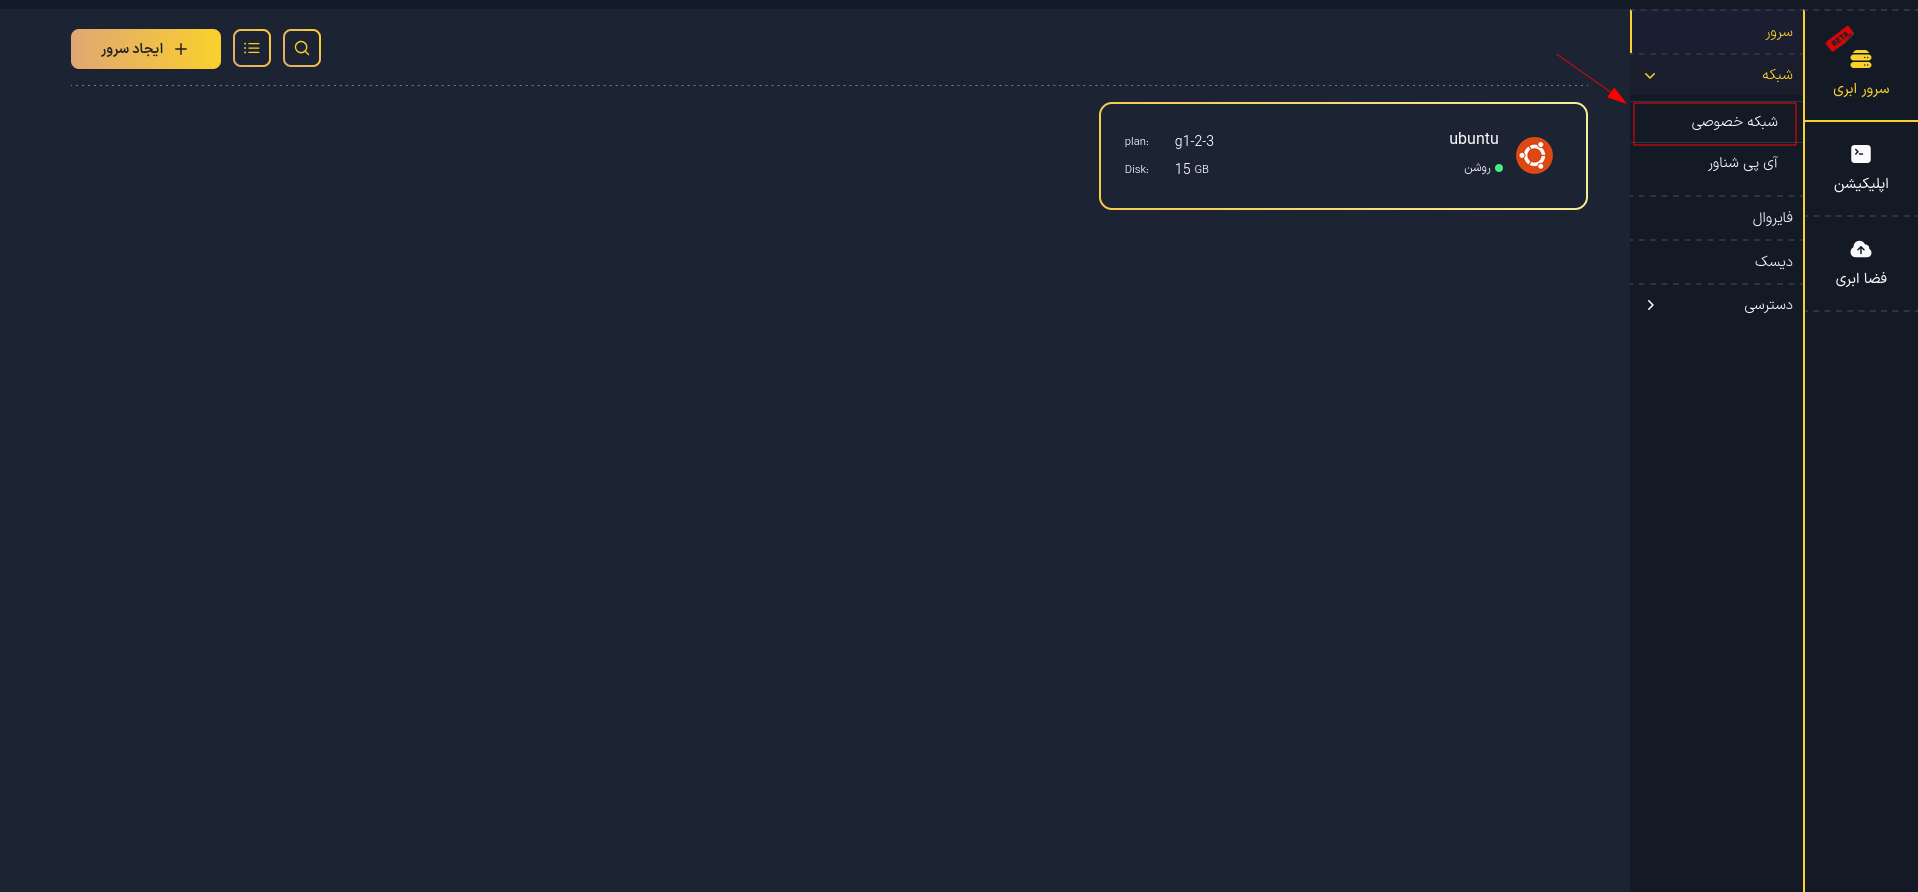
- Select Create Network.
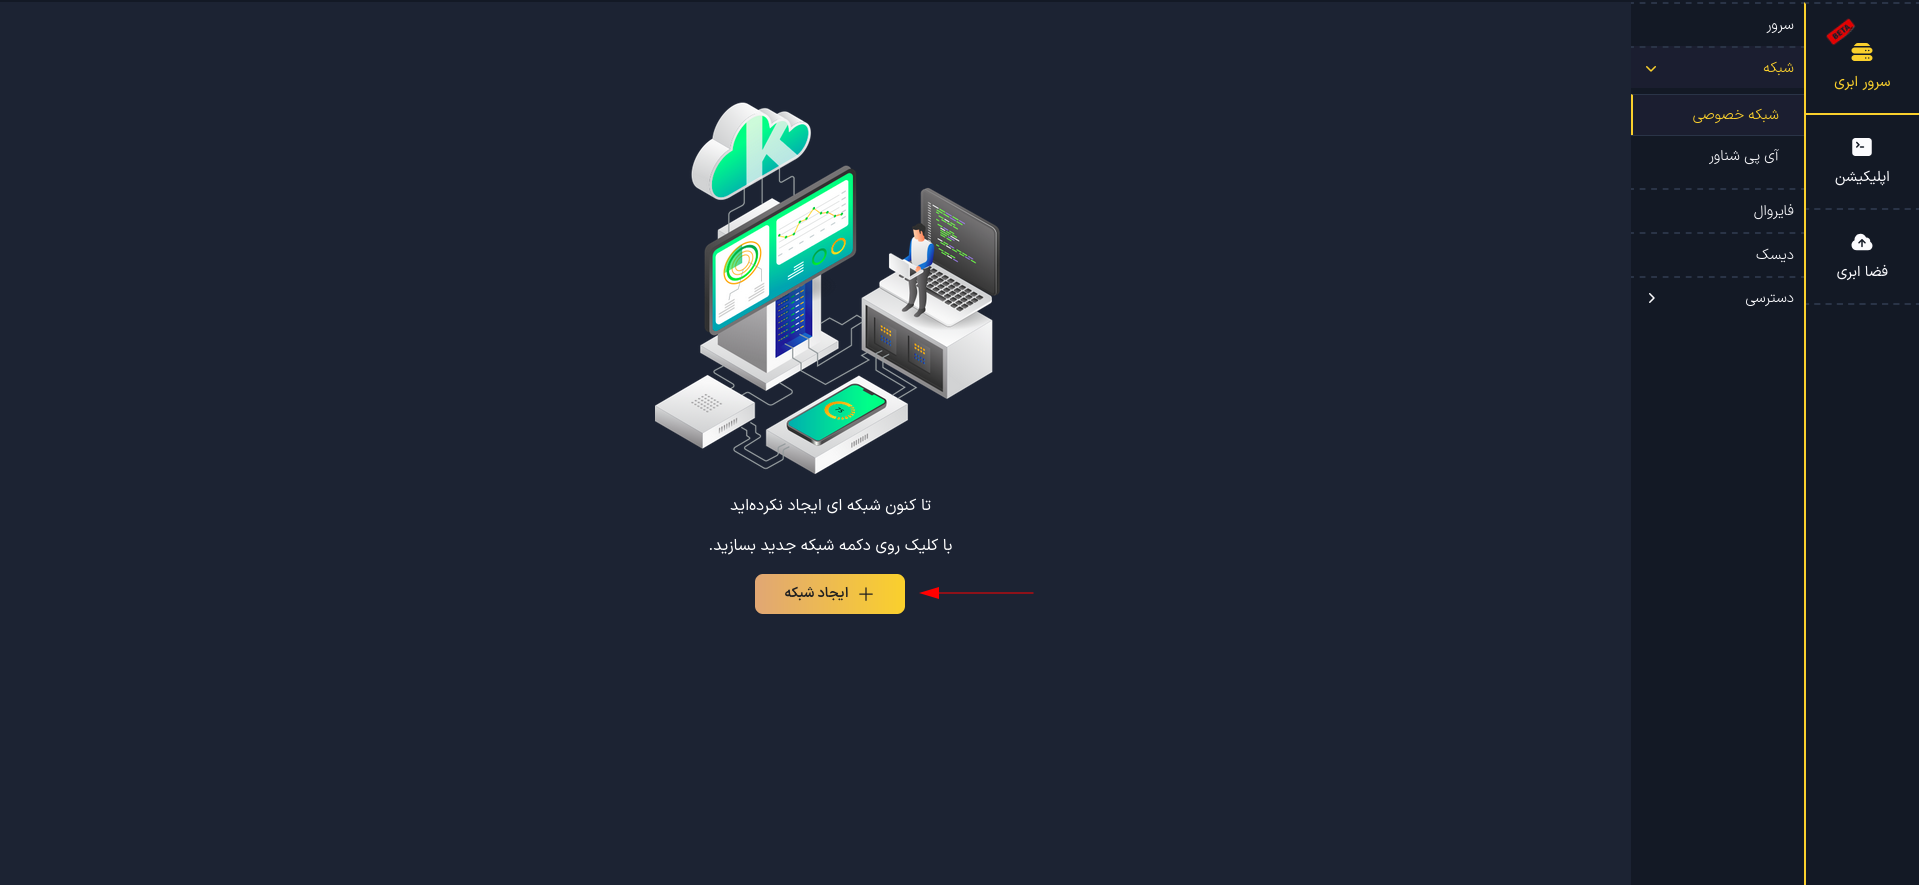
- Click on Private Network.
-
Configure Network Settings:
- IP Address:
- Value:
192.168.1.1/16 - Explanation: This is the base network address with a /16 mask, allowing for 65,534 usable IP addresses.
- Value:
- Network Name:
- Enter a custom name, e.g.,
private-net-01.
- Enter a custom name, e.g.,
- Gateway:
- Enabling this option allows servers within the network to connect to the internet or other networks through the gateway. If disabled, the network will be fully isolated.
- If using a device (e.g., a router) as a gateway, enter its address here.
- DHCP:
- Enabling DHCP allows automatic IP address assignment. If disabled, you must manually assign IP addresses on your servers.
- If no range is specified, addresses will be assigned automatically.
- DNS:
-
Enter preferred DNS servers, e.g.,
8.8.8.8(Google) or1.1.1.1(Cloudflare).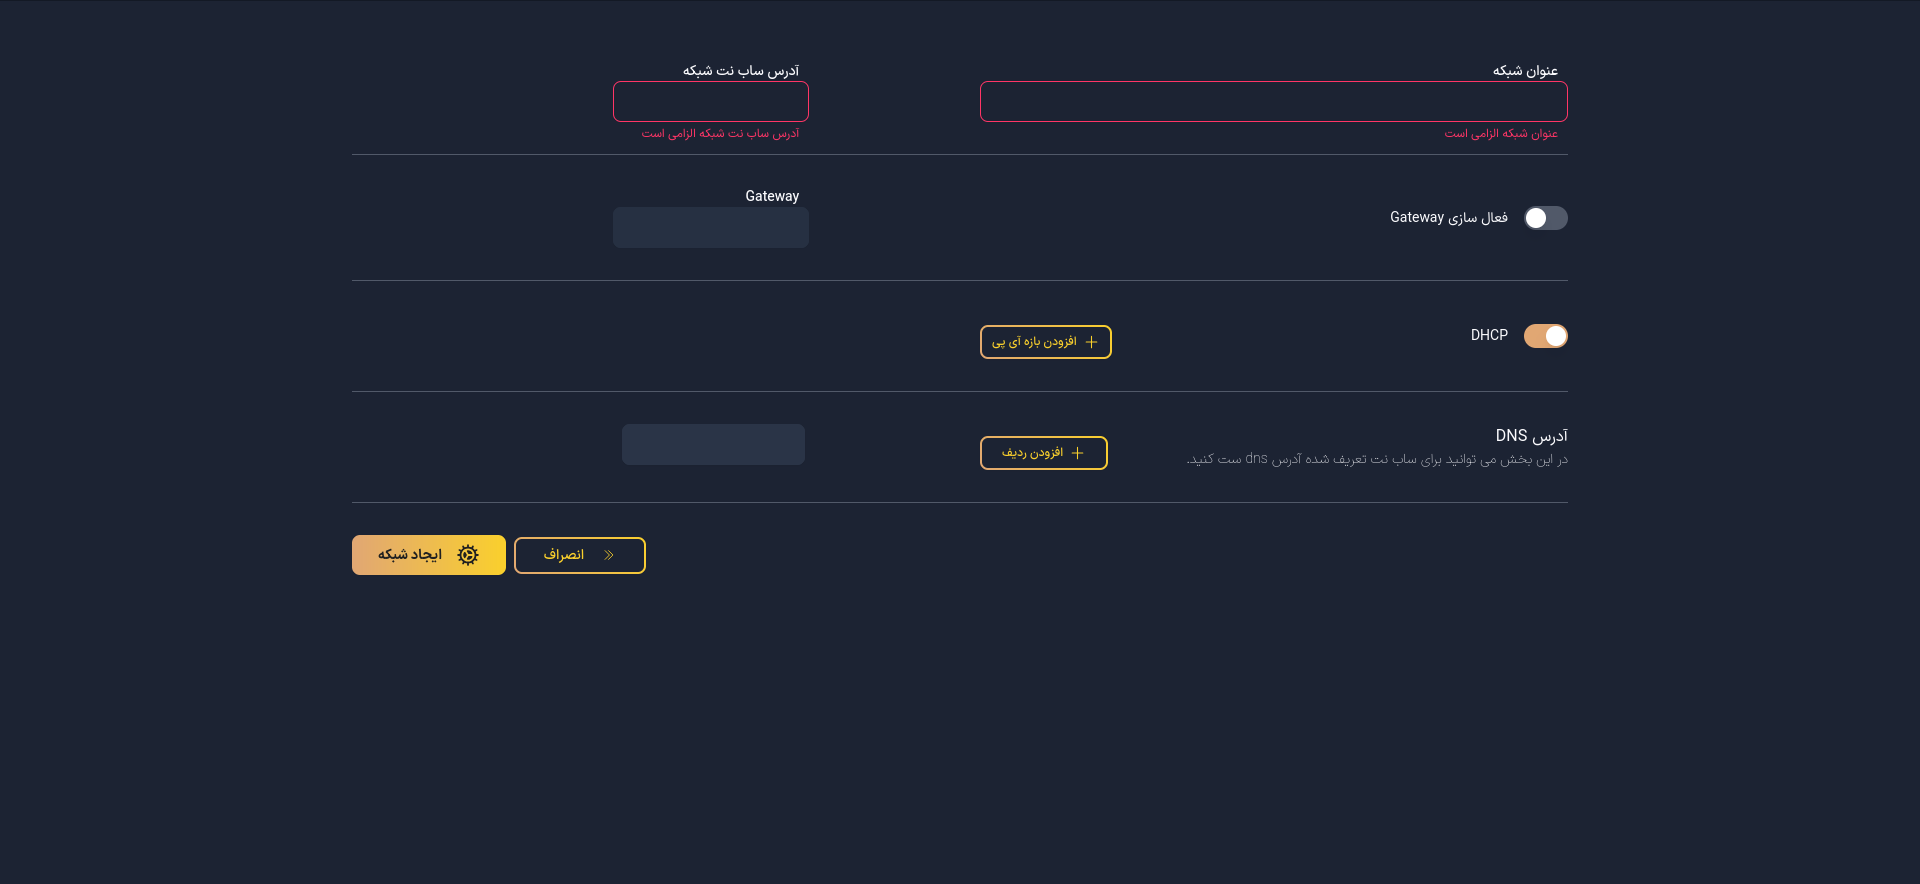
-
- IP Address:
-
Save and Create the Network:
- Click Create Network to finalize the setup.
-
Attach the Network to a Cloud Server:
-
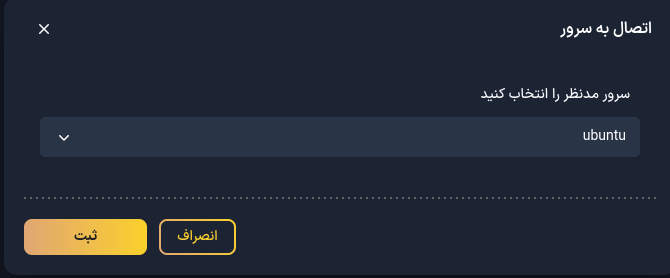
Select the created network and click Attach to Server.
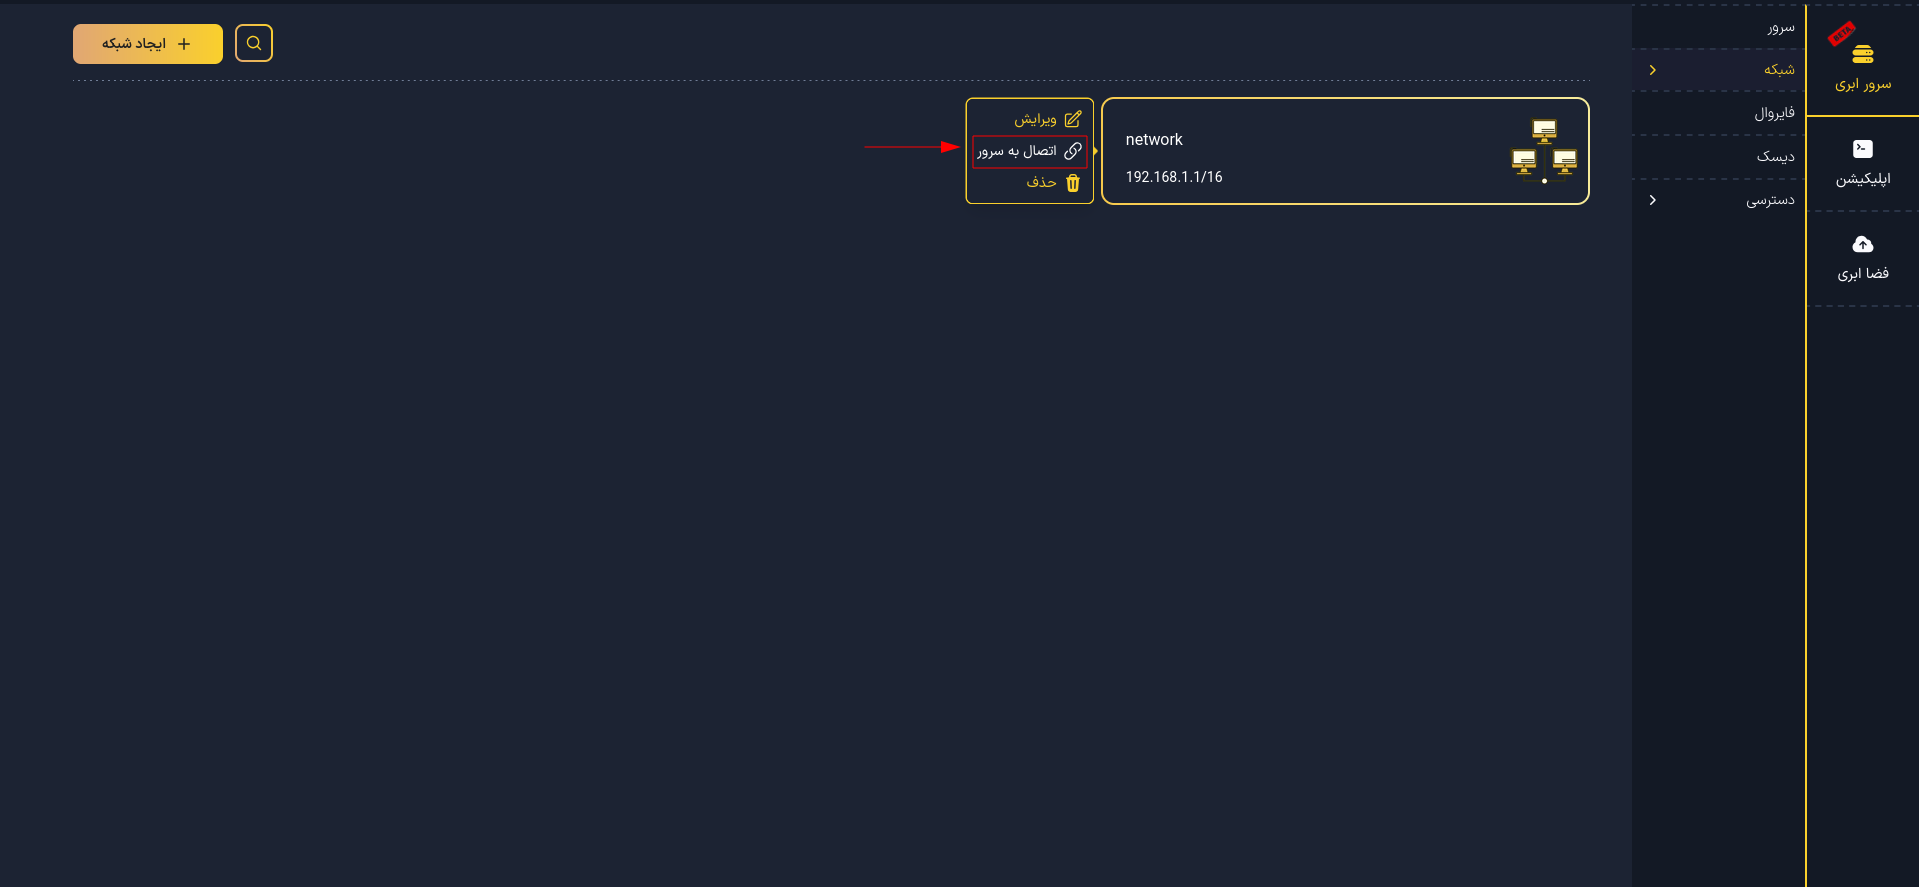
-
In the pop-up window, select the desired server from the list, click Confirm, and wait for the settings to apply.
-
Step 2: Configuring the Network on Linux
After creating the private network, you need to configure the operating system to use it.
1. Identify the Network Interface
First, find the network interface associated with the private network:
# For Ubuntu, Debian, RockyLinux, AlmaLinux
ip a

# For FreeBSD
ifconfig -a
- Note down the interface name (e.g.,
ens6).
2. Edit the Network Configuration File
Modify the network configuration file based on your operating system:
- Ubuntu
- Debian
- RockyLinux
- AlmaLinux
- FreeBSD
echo "network:
  version: 2
  ethernets:
    ens6:
      dhcp4: true
    match:
       macaddress: 'fa:16:3e:fd:93:7c'" | sudo tee /etc/netplan/90-vpc.yaml
sudo chmod 600 -R /etc/netplan/
echo "network:
  version: 2
  ethernets:
    ens6:
      dhcp4: true
    match:
       macaddress: 'fa:16:3e:fd:93:7c'" | sudo tee /etc/netplan/90-vpc.yaml
sudo chmod 600 -R /etc/netplan/
Configuration is done automatically.
Configuration is done automatically.
echo 'ifconfig_vtnet1="DHCP"' | sudo tee -a /etc/rc.conf
3. Apply the Changes
Apply the configuration using the following commands:
- Ubuntu
- Debian
- RockyLinux
- AlmaLinux
- FreeBSD
sudo netplan apply
sudo netplan apply
No manual action is required.
No manual action is required.
sudo service netif restart
4. Verify the Configuration
Check the configuration using:
# For Ubuntu, Debian, RockyLinux, AlmaLinux
ip r

# For FreeBSD
ifconfig -a
- If using a static IP instead of DHCP, change
dhcp4: truetodhcp4: falseand manually enter the IP address, gateway, and DNS in the configuration file. - Ensure that the network interface name (e.g.,
ens6) matches the output ofip aorifconfig -a.