Getting Started
To quickly and easily set up and transfer your project from Git to the Kubar platform, you first need to click on the Create Application option on the dashboard, and then click on the Git option in the Your Application tab.
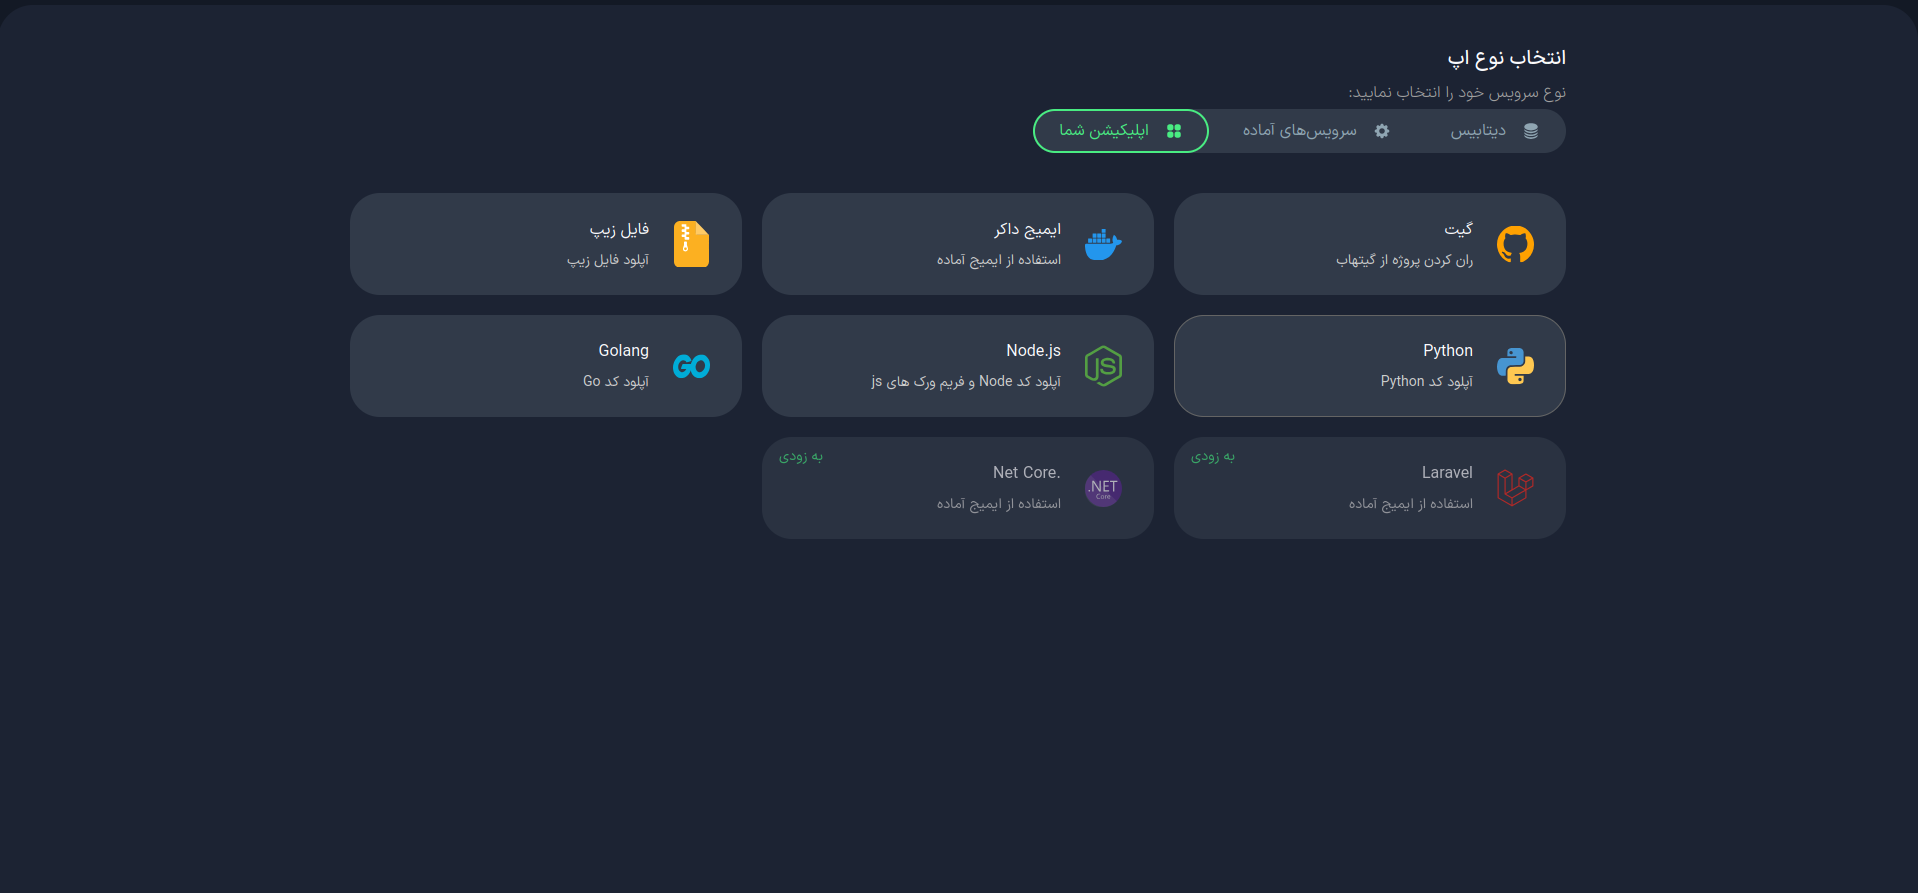
Prerequisites
To use this service, you must have the Dockerfile for your project in your Git repository.
After selecting the Git option, you will be redirected to the application creation page.
1. Initial Settings
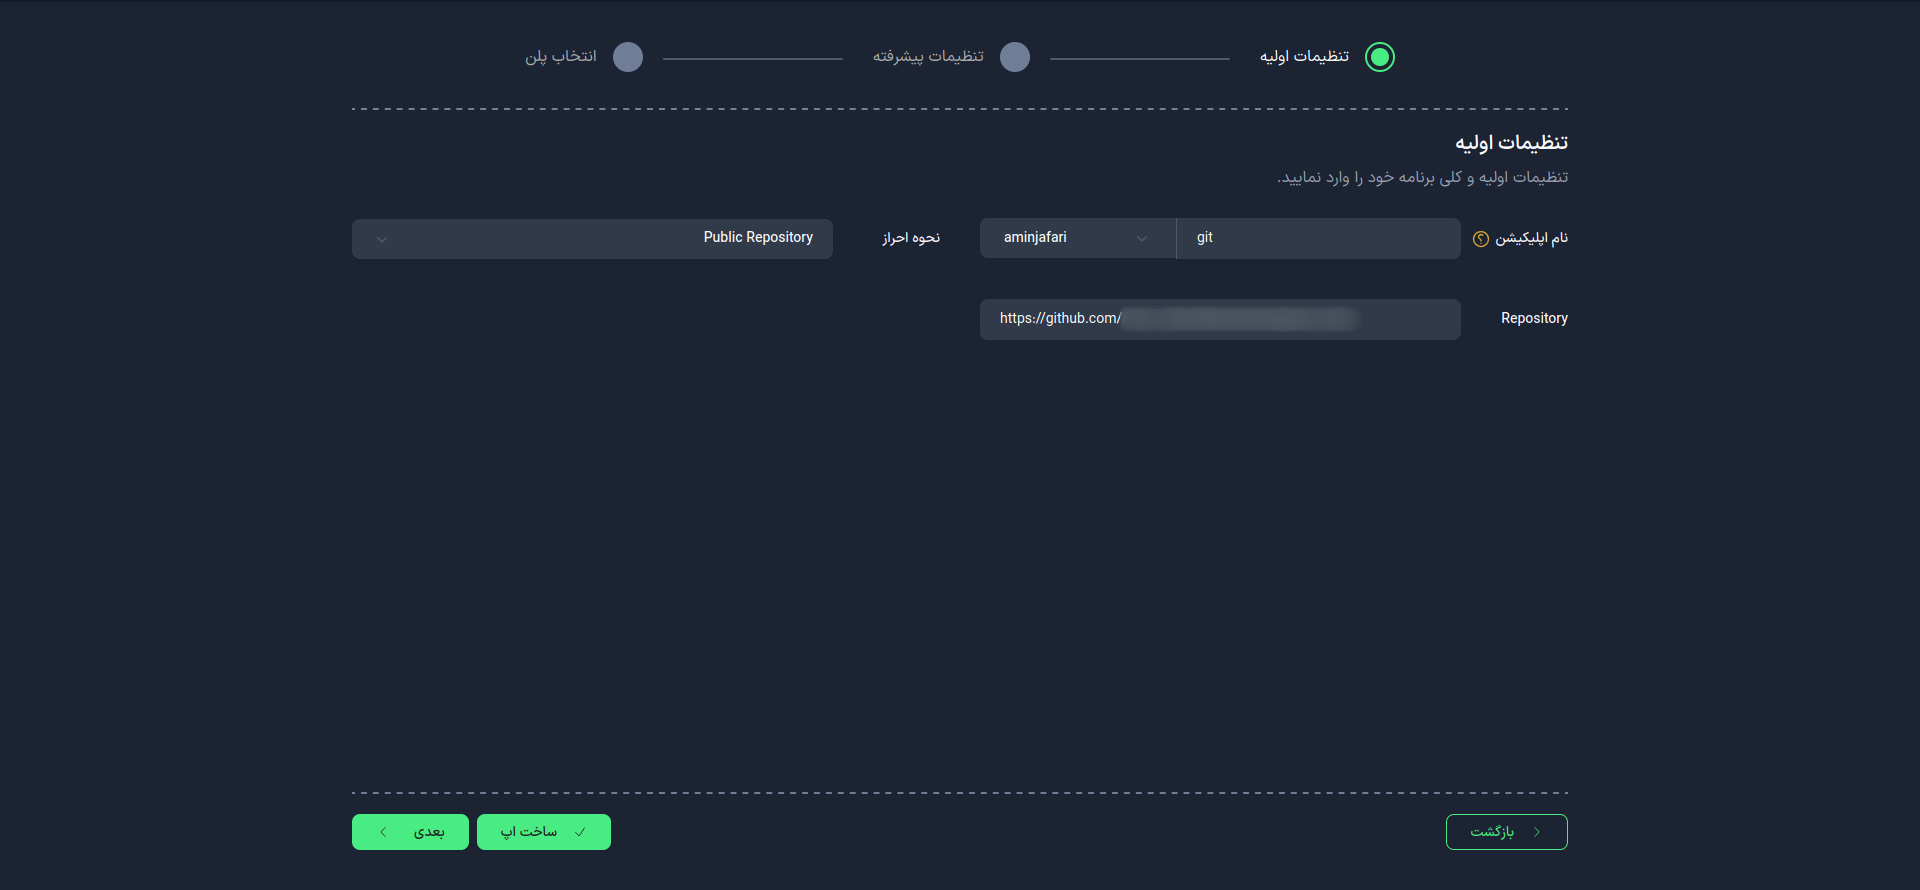
First, choose a suitable name for your application. This name will be used as an identifier in your project domain.
- Use lowercase letters and only use - as a separator between words.
- You cannot change the application name after the app is created.
Git Repository Address
Enter the address of your Git repository. Example: https://github.com/username/repo
Types of Repositories
- Public: Enter the address directly.
- Private: You can connect your private repo to Kubar in two ways:
Connect with Access Token
Connect with SSH Key
Once you complete this step, select the "Next" option.
2. Advanced Settings (Optional)
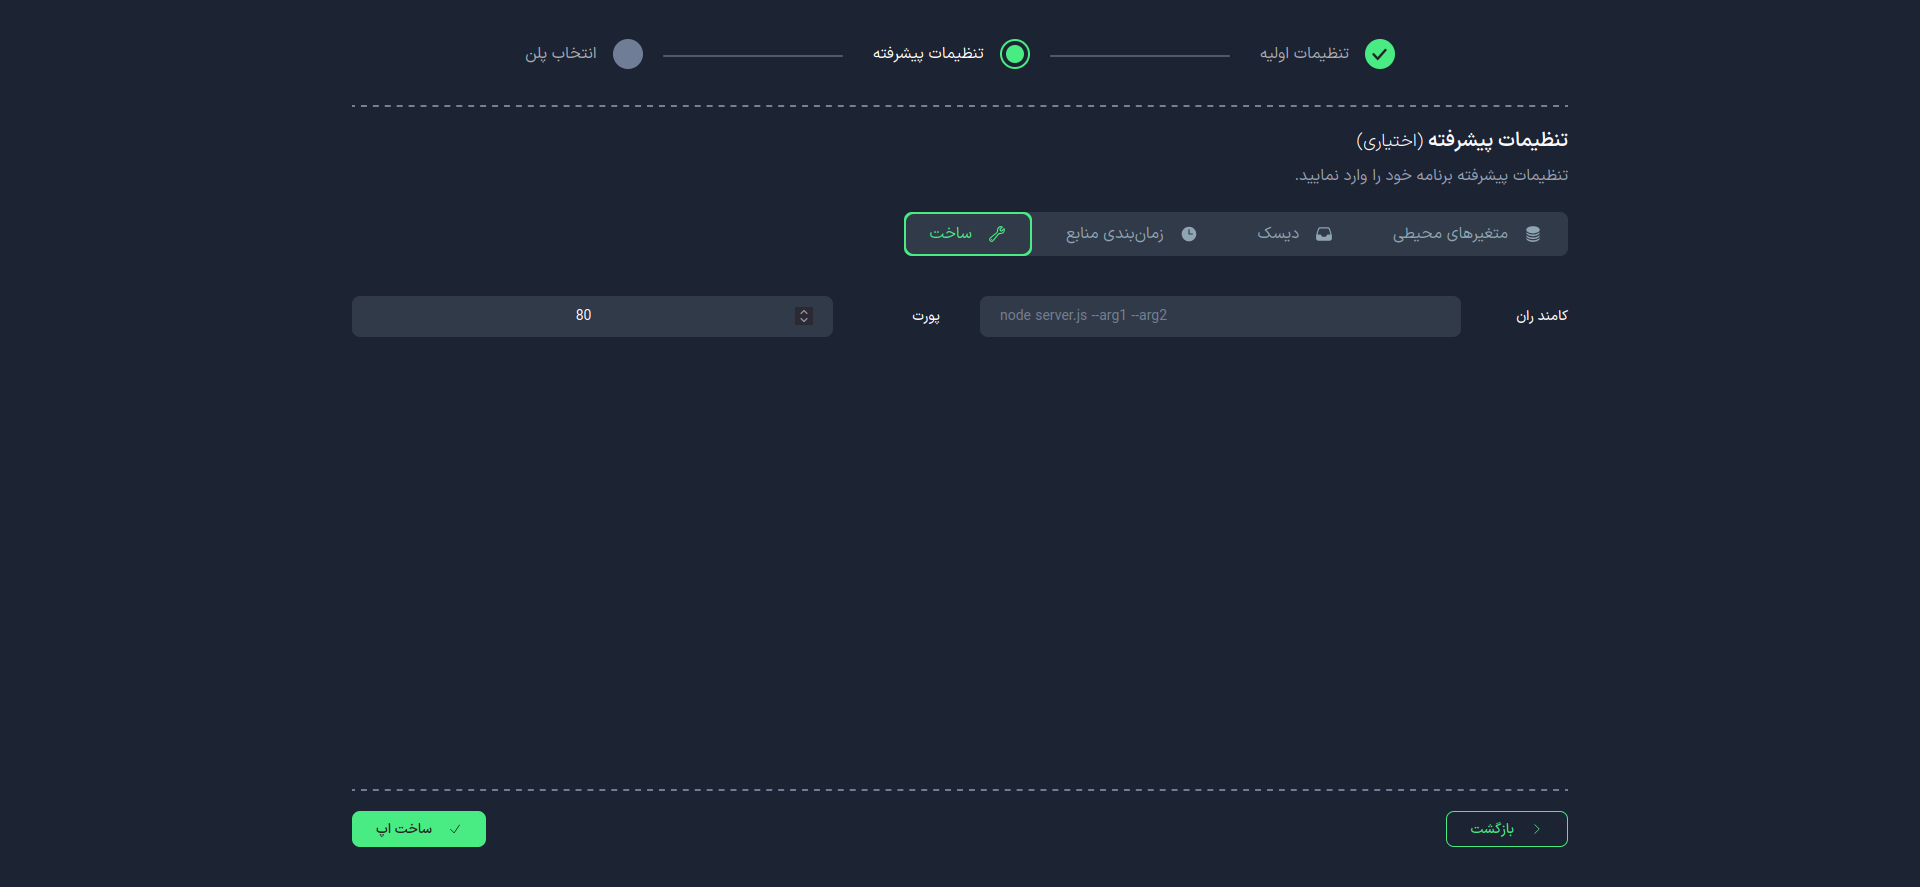
In this section, you can apply more advanced settings:
Build
Run Command
The command that will be used to run your project.
Port
Specify the port number on which your application will run.
-
After the initial setup, you can change the port.
-
If you entered a command in the run command, make sure your application listens on the address 0.0.0.0 and the desired port.
Resource Scheduling
Disk
Environment Variables
3. Select Plan
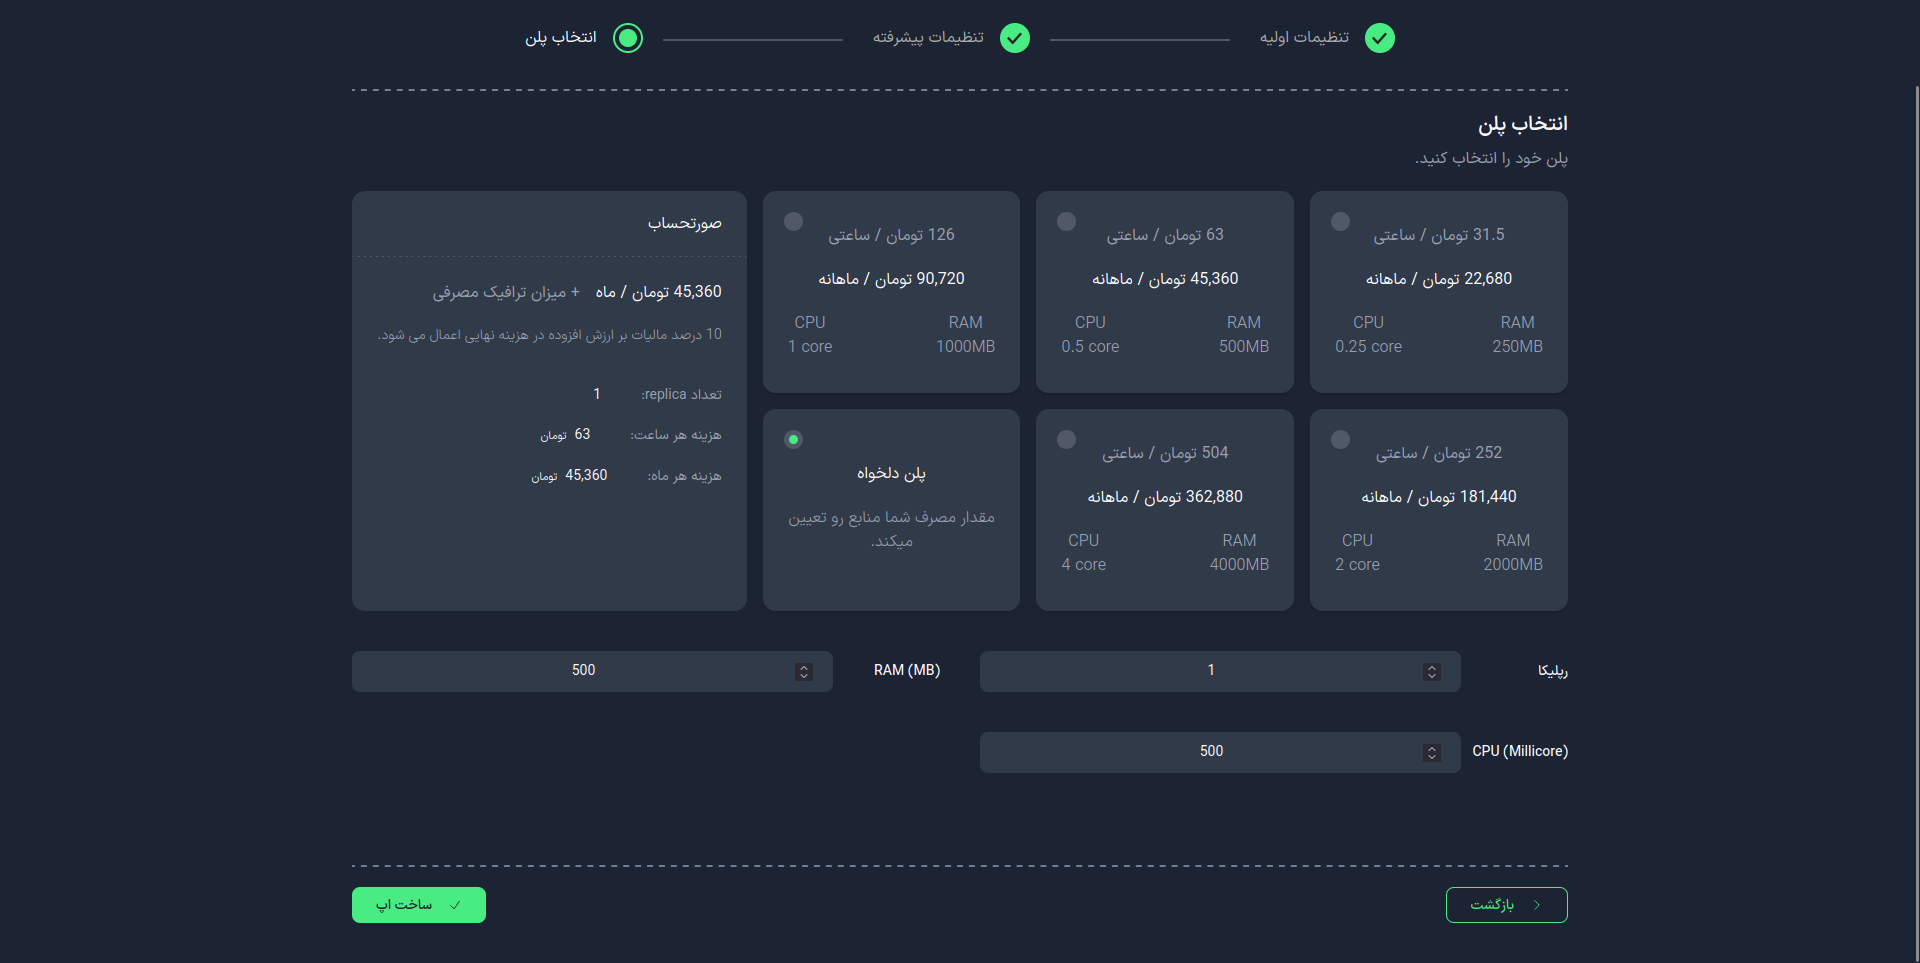
In this step, choose your desired plan. You can select from the available list or configure it manually.
Replicas
Specify the number of replicas (running instances) for your application. This number affects the performance and availability of your application.
Importance of the Number of Replicas
- Scalability: Increased processing power with more replicas.
- High Availability: Maintaining performance in case one instance fails.
- Load Distribution: Distributing the load among multiple instances.
After selecting your desired plan, choose the Create App option.
4. Project Management
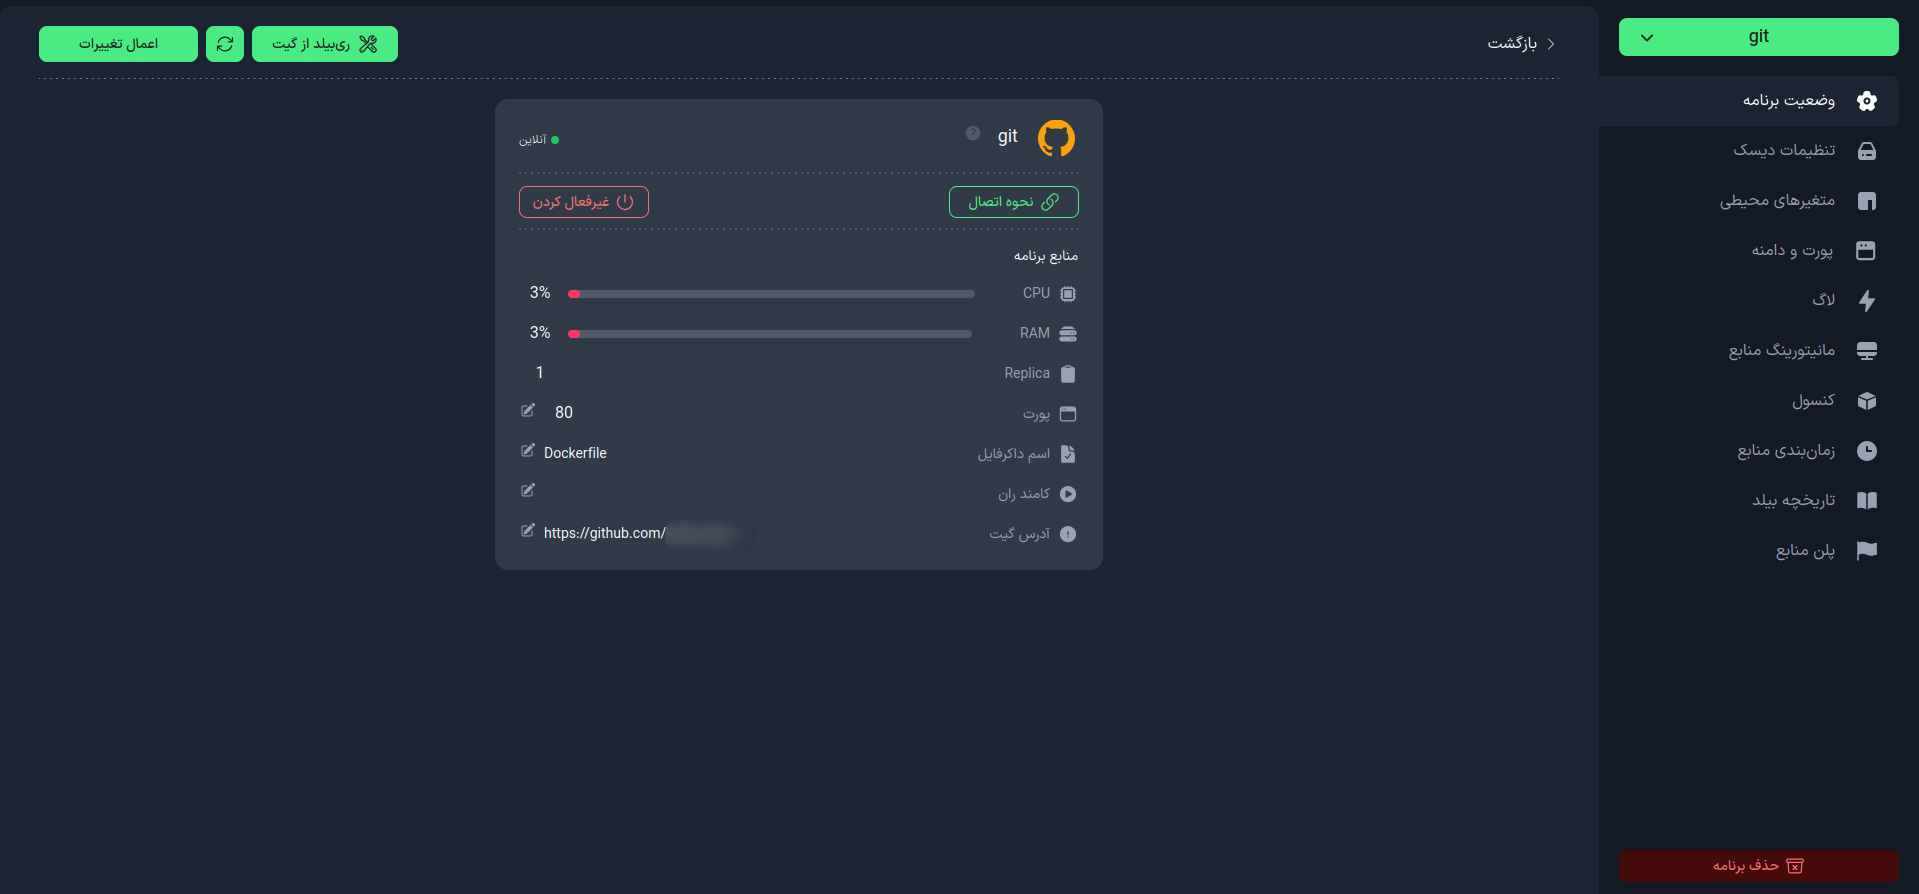
In this section, you will have access to project management features:
- Check project status
- How to connect to the project
- Review application resources
- Number of Replicas
- Manage port
- Change Dockerfile name (if needed)
- Change run command
- View and change Git address
- Rebuild project from Git
- Restart project
With these features, you can effectively manage and maintain your project.